Deploy
Introduction
This guide will take you through programming an OpenOBS-328 sensor for deployment. You will need a computer (preferably windows), a micro usb cable, an OpenOBS-328, and a AA-sized Li-ion or LiSOCL2 battery. If you have a windows computer, you can use the graphical user interface (GUI) to quickly deploy or update the firmware. Alternatively, you can compile and upload the source code directly.
Most of this guide describes setting up your computer, which requires an internet connection for downloading files and troubleshooting issues. You will only need to do these steps once per computer.
Table of Contents
Programming
At this stage, your OpenOBS-328 should have the firmware installed, but still we need to update the current time and send over our deployment settings. The GUI is the easiest and fastest way to upload settings, or even flash pre-compiled firmware, but only works on Windows computers. On other platforms, or if you need more control over the logger firmware, you can edit the firmware, recompile, and upload using the Arduino code editor.
GUI
Setup
-
All of the latest OpenOBS GUI files and documentation are available in a seperate github repo. Download the github repository and then navigate to OpenOBS-GUI/bin/ and try to run the OpenOBS_328_GUI.exe application. The program will only run on a Windows computer with the .NET 5 Desktop Runtime. If you don’t have the correct runtime, an error will pop up and direct you to the download page.
-
Connect an OpenOBS-328 sensor to your computer with a micro USB cable to test your setup.
- Click the dropdown menu at the top of the deploy GUI and select the COM port that corresponds to the OpenOBS. You can identify the right port by trial and error (press the connect button and wait a few seconds), or by noting the available COM ports, disconnecting the OpenOBS, opening the dropdown again to refresh the list, and checking which COM port has disappeared.
- If you can not find the OpenOBS COM port, you likely need to download and install the CH340 USB-Serial driver on your computer.
- If you still can not find the COM port, you may need to reflash the firmware on the sensor. Try following the steps in the next next section.
-
After connecting to an OpenOBS, the sensor will go through a startup and self checkout before letting you program it. Any errors will be displayed on the right side of the GUI along with possible solutions. If there are no errors, the “Send Settings” button will be enabled and turn green while the sensor waits for you to choose the deployment settings:
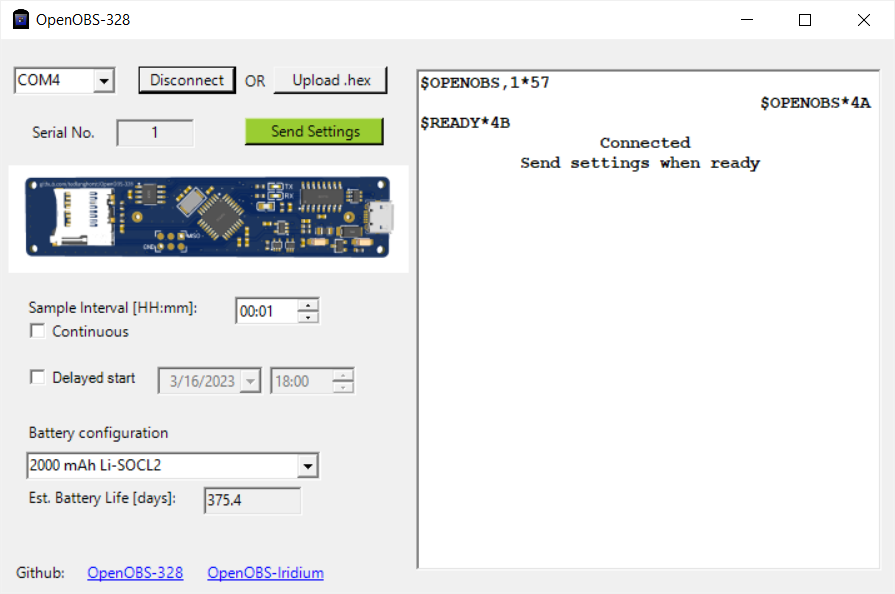
- At this point you have successfully set up the deployment GUI. Good job! If you use the same USB port in the future, the COM port should be the same every time you connect an OpenOBS.
Deploying
- Open the OpenOBS and slide the circuit board out of the PVC housing. Install a 3.6V Li-SOCl2 or 3.7V Li-ion AA-size battery.
:warning: A regular 1.5V AA battery (even the lithium types) will not work. The USB connection provides power while plugged in, so you will not have any indication that the battery is working while programming the sensor.
- Connect the OpenOBS Arduino and the computer with a micro USB cable.
- Open the deployment GUI program.
- Select the correct COM port and click “Connect”.
- If there are no errors on startup, the “Send Settings” button will be enabled and turn green while the sensor waits for you to choose the deployment settings.
- Enter your sampling interval. Select delayed start if you want the logger to sleep until the set time. In addition to setting the measurement interval, sending the settings to the OpenOBS synchronizes the clock with your computer. Make sure your computer time is accurate and set to your time zone of choice, as there are no time zones recorded on the OpenOBS.
-
Selecting the battery from the dropdown will give you an estimate of the battery life. Be conservative with these numbers, they are extrapolations of short term measurements and not fully tested. Our best estimates (and tests) of battery life are here:

-
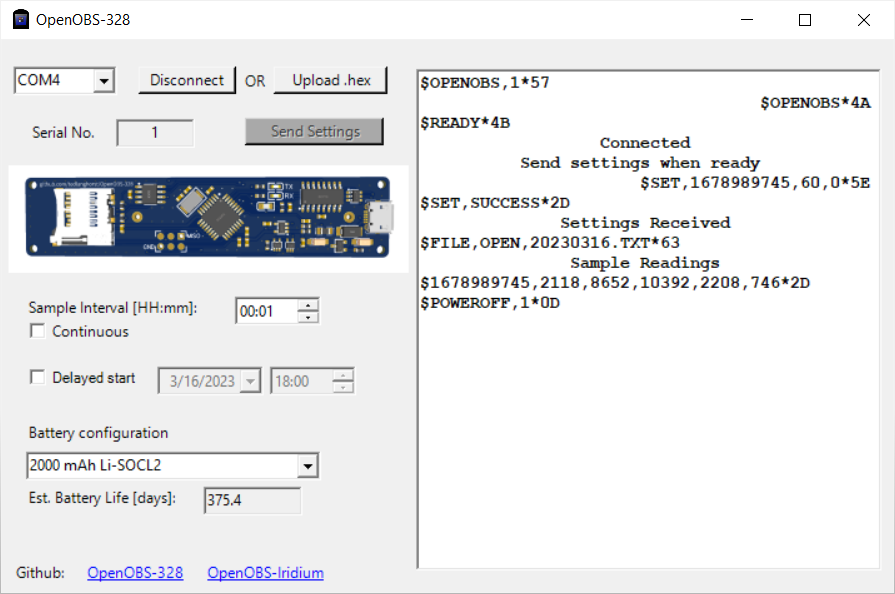
Click “Send Settings”. The OpenOBS will print out raw data when it logs while connected, refer to the data page to interpret it.
Arduino Code
- This option is nearly identical to the steps required to set up a newly-constructed sensor. Follow the programming directions on the build page.
- Change the variable sleepDuration_seconds to set the measurement interval.
- Change delayedStart_seconds if desired.
- When you upload the code, the compiler will take the time from your computer, so make sure it is accurate and in the right time zone you want to record in the data.